Getting started with Datanamic SchemaDiff
Datanamic SchemaDiff is a tool that can compare and synchronize database schemas (the structure) of two databases. You can use Datanamic SchemaDiff to compare and synchronize database schemas for Oracle, MySQL, MS SQL Server, InterBase, Firebird and PostgreSQL databases. This article demonstrates a basic comparison and synchronization of two database schemas.Starting Datanamic SchemaDiff and specifying data sources
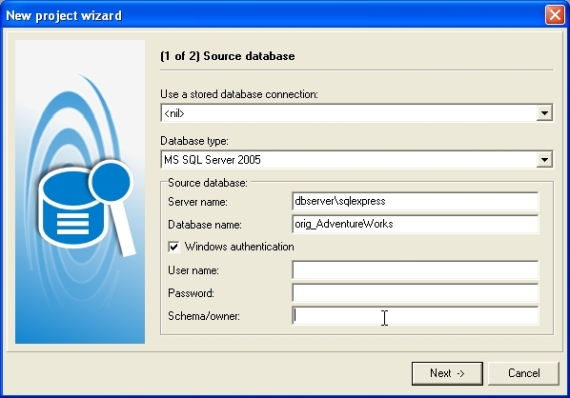
When you start Datanamic SchemaDiff the Welcome dialog opens and you can choose to start a new project or reopen an existing project. Choose New Datanamic SchemaDiff project to start the new project wizard.In the first step you are prompted for the connection parameters of the source database. The source database is used as the reference database for the comparison and synchronization and will not be changed. Depending on the database type (Oracle, MySQL, MS SQL, PostgreSQL, InterBase, FireBird, etc) different connection parameters such as server name, host, user name etc may be required.
Figure 1: Specify location of source database.
If your database supports schemas (or owners), a schema/owner parameter will be available. If you leave this empty, all database objects (tables, constraints, views, procedures etc) from all schemas will be retrieved from the database. If you provide a schema/owner name, only the database objects of that schema will be compared.
Press Next to continue.
You are prompted for the connection parameters of the destination database. Synchronization will change the structure of the destination database. Enter the connection parameters in the same way as you did for the source database.
Press Finish to close the New project wizard and to start comparing the database.
Comparing the databases
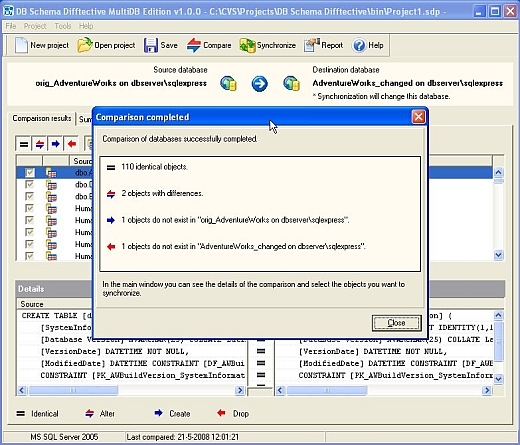
Datanamic SchemaDiff will now read in the source and destination database. Before Datanamic SchemaDiff starts comparing the databases, it may ask you to map schemas if schemas could not be mapped automatically. When the schemas are mapped (by the user or automatically), the source and destination databases are compared. Datanamic SchemaDiff displays a message dialog box that shows the progress of the comparison. When the database objects are compared, a summary of the comparison results is displayed. Press OK to close this dialog and to return to the main window.You can always compare the databases again. Use the Compare button to recompare the source and destination database.
Figure 2: Comparison results summary after comparing databases.
Viewing the comparison results
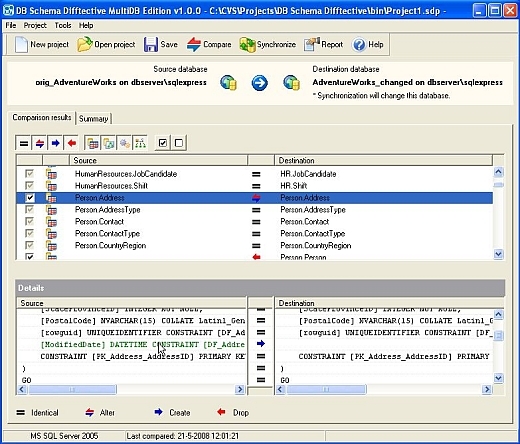
The comparison results are displayed in the main window. You will see all database objects with an indication if they are identical or if they will be changed, inserted or deleted in the synchronization. If you select an object in the list then you can see the details of the differences below in the Details pane.
Figure 3: Comparison results.
By using the filter buttons you can filter the comparison results by status (identical, different, etc) and type of object (table, procedure, view, etc.). These filters can be combined. For example you can choose to view only the tables (type of object filter) with the status to be dropped (status filter). The select all and deselect all buttons apply to the filtered list only, so you can easily deselect all tables to be dropped in order to exclude them from the synchronization. The selections are saved in the project.
Synchronizing the databases
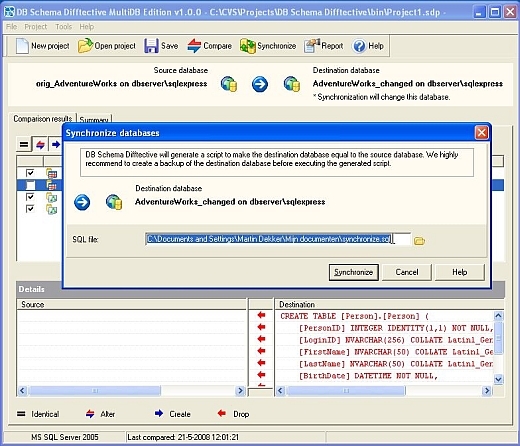
After reviewing the comparison results and making the selections we can start synchronizing the databases. Datanamic SchemaDiff will generate a SQL script to change the destination database.Select Project | Synchronize (shortcut F9) or press the Synchronize button. The Synchronize databases dialog will appear. Choose a name and location for the SQL file that must be generated and press the Synchronize button. Datanamic SchemaDiff will now create a synchronization script for the destination database.
Figure 4: Specify name of synchronization script.
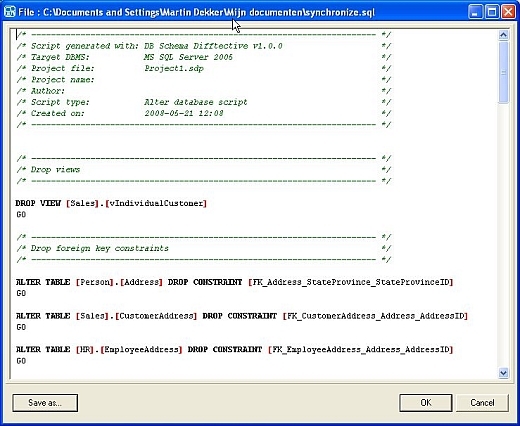
After the generation of the synchronization script, the Generated files dialog is shown. Select the sql file and click the View button to open the script.
After reviewing the generated script you need a tool to execute sql script and run the script on the database. NOTE: Before executing the script we recommend to make a backup of the destination database.
Figure 5: Generated synchronization script in interval viewer.
After executing the script the destination database is synchronized with the source database. Compare the databases again in Datanamic SchemaDiff. Select Project | (Re)Compare (shortcut F8) or press the Compare button.
Generating a comparison report
You can generate a report with the comparison results to make it available for other persons. After completing the comparison select Project | Create report. You can set some options in the Create report dialog, for now just click OK. After generating click Yes when asked if you want to view the report. The HTML report will be opened in your default browser.Reusing the project
If you need to synchronize the same databases more often you can reuse the same project. The connection parameters, schema mappings and the selection of objects you want synchronize will be saved in the project file. If you reopen a saved project, Datanamic SchemaDiff will ask if you want to recompare after loading the project. Just click Yes and Datanamic SchemaDiff will reconnect to the databases and perform the comparison again. After comparing you can generate the synchronization script again.
Resources
Learn- Datanamic SchemaDiff: Learn more about Datanamic SchemaDiff.
- Check out Datanamic SchemaDiff's companion product Datanamic DataDiff for comparing and synchronizing data in two databases.

